How To Make Shoe Soles? The best shoe sole-making techniques I will talk about here are the most common and most beautiful sole constructions every beginner in shoemaking can do working with leather.
There are many other possible shoe-making techniques, of course, that you can use in making your shoes but I chose these 6 sole-making constructions because most of them don’t require any special shoemaking tools. Also, to make soles for your shoes following these sole making constructions you will need to work with vegetable-tanned leather, and this material is very easy to source online or locally.
Table of Contents
You Might Also Like ⇒
- Best Shoes For Standing All Day
- Best Insoles For Running
- Best Boots For Ranger School
- Best Volleyball Shoes For Women
- Best Volleyball Shoes For Men
- Best Marathon Shoes For Women
- Best Marathon Shoes For Men
- Best Running Shoes For Bad Knees
- Best Running Shoes For Shin Splints
- Best Running Shoes For Narrow Feet
- Best Running Shoes For Shin Splints
- Best Running Shoes For Wide Feet
- Best High Top Running Shoes
- Best Trail Running Shoes For Women
- Best Trail Running Shoes For Men
6 Best Shoe Sole Making Techniques in 2023
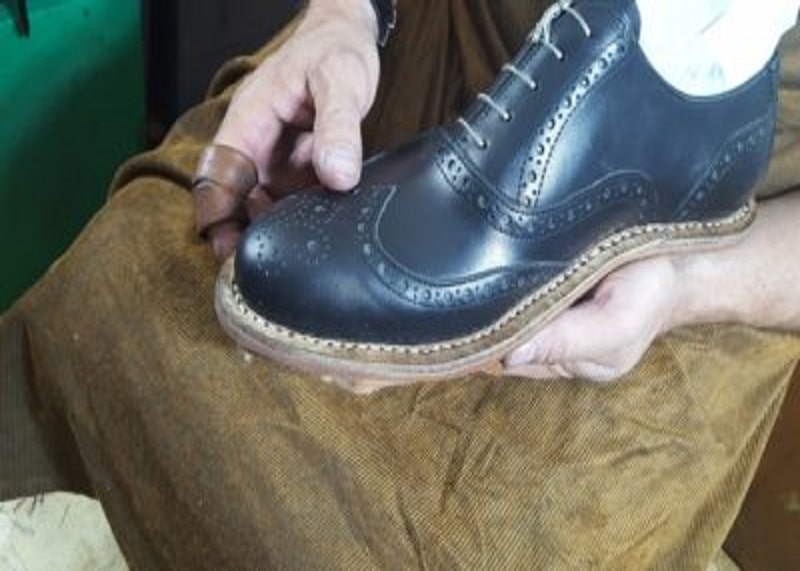
How To Make Shoe Soles? We actually can divide most of the sole-making techniques into 2 types: how to make shoe soles with cemented construction and stitched shoe soles. Let’s start first with cemented shoe soles. Shoe soles with cemented construction are soles that we attach simply with cement (contact leather glue) to the shoe bottom.
In general, there are 4 types of cemented shoe soles.
1. Perfect Shoe Soles For Beginners or Alternative Techniques of Sole Making.
I call this sole-making technique a perfect one because every beginner in shoemaking can make it without any special shoemaking tools. I invented this technique, especially for my students and it is an alternative way to build beautiful and comfortable shoe soles like a pro.
Here are the main steps of this technique:
- You should flatten the shoe bottom with a cork filler and make the entire surface smooth
- Make a pattern of the sole following the edge of the lasted upper
- Cut out leather (sole bend) using this pattern
- Skive the sole edge (2-3mm thickness)
- Make a finishing of the edge before you will attach it to the shoe bottom
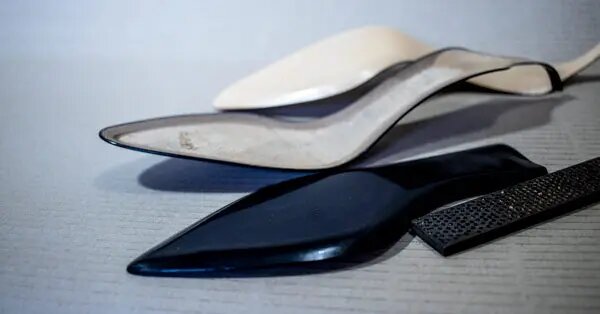
2. Traditional Sole Making Technique.
As you can understand from the name of this shoe type it is 100% the traditional sole making technique that exists in shoemaking from the beginning of this craft. The biggest difference from the first type is that it comes bigger than the shoe bottom and the extra of it must be cut after attaching to the shoe bottom.
So main steps of this sole construction:
- You should flatten the shoe bottom with a cork filler and make the entire surface smooth
- Make a pattern of the sole following the edge of the lasted upper plus an extra 7-8mm
- Cut out leather (sole bend) using this pattern
- Skive the sole edge (2-3mm thickness)
- Attach the sole to the shoe bottom and cut the extra
- Then the raw and flashy edge of this shoe sole must be smoothened with a special shoemaking tool.
Ah, by the way, the extra sole edge you can cut also with the use of a special lip knife. It will protect the leather upper from scratching.
There was a very short explanation of this approach but full step-by-step traditional sole making technique you can learn in one of my courses, for example, “T strap pump shoe course”.
This approach requires experience, so if you have some leather skins that you don’t mind ruining, you can try to use this technique in making your shoes.
3. Elegant Shoe Sole Technique With Heels.
This type of shoe sole you need to build when you work with heels the inner part (heel breast) of which must be covered with the sole. So the entire shoe sole includes the part of the shoe bottom and the part of the heel. And how to make shoe soles with this technique.
To create this elegant shoe sole you can use one of the shoe-making methods I listed above. The main step here is to skive well this part of the shoe sole that covers the heel breast.
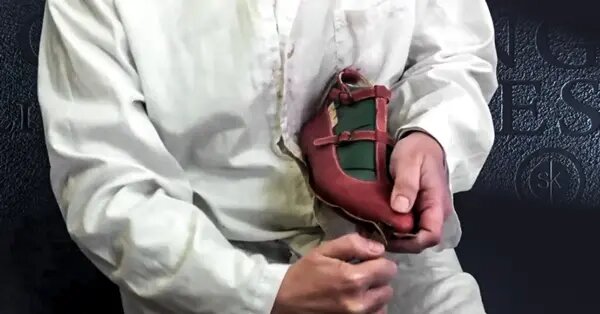
4. Making Sole With “Fake” Welt.
There is a real welted shoe sole construction ( we will talk about this shoe sole construction later in this article), and there is a “fake” welted construction that imitates the real one. There is a way how to make shoe soles.
This sole-making technique is very simple and almost doesn’t require any special tools and skills. To make this sole type you need to attach a ready-made leather strip (welt) to the shoe bottom and then you need to attach the leather sole. The sole must be bigger than the shoe bottom and then extra of the sole edge we need to cut out and finish this edge to make it look smooth and shiny.
This sole-making technique is one of the easiest ways to create beautiful shoe soles for beginners in shoemaking. In this atrial “4 Design Solutions That Will Make Your Shoes Look Better” you can learn what are the most common mistakes beginners in shoemaking do and what are the solutions. So this sole-making technique is one of the possible solutions in making shoes without mistakes.
I teach how to create this shoe sole type in my “High heel Pump Shoes”.
5.“Opanka” Shoe Sole Technique.
This is Italian shoe sole construction where the edge of the leather shoe sole overlaps the beginning of the upper and must be sewn to the upper through all layers of the shoe. That’s why opanka shoe soles last for a long time.
Here are the main steps of opanka how to make shoe soles:
- You should flatten the shoe bottom with a cork filler and make the entire surface smooth
- Make a pattern of the sole following the edge of the upper plus an extra 1-1.5 cm.
- This extra will overlap the upper.
- Skive the edge and place it on the shoe bottom
- Sew the edge of the shoe sole to the upper
Here you almost don’t need to use contact glue, you sew the entire shoe sole to the upper. This is one of the benefits of this sole-making technique that you will use glue a little.
I like this shoe sole technique and you can learn it in my ”Bespoke Derby Opanka shoe course”.
6. English Welted Shoe Sole Making Technique
How to make shoe soles by English welted shoe sole construction is the construction where all parts of the shoe are sewn together: insole, upper and lining, stiffeners, and shoe sole. Here we sew the welt to the insole and upper unlike in the “fake” welted shoe sole technique I talked about at the beginning of this post.
This sole-making technique is the hardest among all other techniques listed previously and requires some experience in shoemaking. This construction is very solid and lasts for a long time. It is a pretty complicated technique and we teach it in my “Bespoke English welted oxford Shoe course” but I want to show you briefly the main steps:
- Make a holdfast in the leather insole before you go to last the upper.
- The holdfast is a kind of wall inside the leather insole with the holes that you need to create.
- Through these holes, you will sew the upper to the insole.
- Prepare the welt and if you want to learn how to make a real leather welt, make sure to see this tutorial “How to Make Shoe Welt”.
or use a ready-made one and sew it to the upper and insole - Flatten the shoe bottom with the cork or some leather piece
- Attach the shoe sole and sew it to the welt
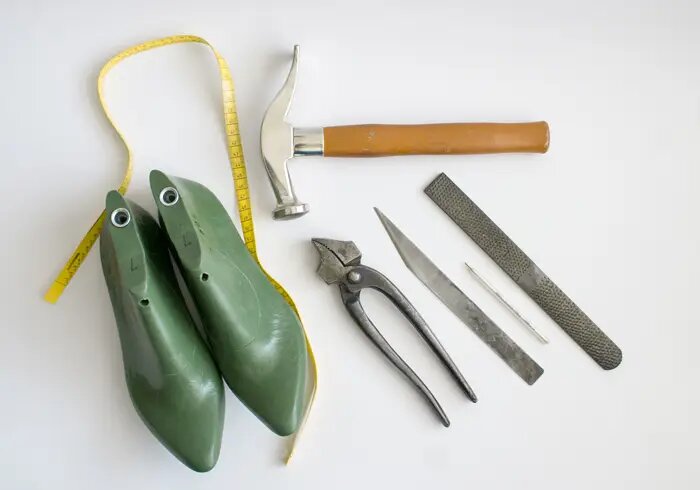
Beginners Make Shoe Sole Tools & Materials: The Definitive Guide:
How To Make Shoe Soles? Beginners in shoemaking have a lot of questions about shoemaking and this is how it should be when you are a beginner in shoemaking. In this post, I will talk with you about the main problems that beginners in shoemaking encounter and will show you how to resolve them.
I will teach you how to make shoe soles with a minimum set of shoemaking supplies with my step-by-step Shoemaking Tools and Materials training. You want to make your shoes, you dream about learning shoemaking for so long, but before you start, there are so many obstacles that most of them you created yourself.
I am talking from my own experience and observation of others that learn this wonderful craft. The number one obstacle that I hear from beginners in shoemaking is tools and materials. The truth is, you don’t need that much to get started. There is a simple reason for this, and it is because you are a beginner in shoemaking.
You don’t need many tools, you don’t need fancy machinery, because first, you need to learn how to work with basic tools and materials and progress as you go on. Once, I was a beginner just like you, and trust me I didn’t have much.
How To Make Shoe Soles? About 2 years ago I published the “25 shoemaking tools and materials you need to get started” guide, but today I want to focus on must-have tools and materials to show you that you can start learning shoemaking today. To show you the big picture and make you understand where you should use every tool and material, we will go through the entire process of making shoes, from start to finish.
The first question that each beginner in shoemaking asks is:
What Tools Do Shoemakers Use?
How To Make Shoe Soles? This is where your problem is starting because you are thinking that you need a lot of shoemaking tools.
This is how many different shoemaking articles that you found on the net mislead you. They list many different shoemaking tools, machinery, shoemaking tools with names that you even don’t know what is it and as a result.
You think that is very difficult to arrange all these shoemaking supplies that you even can’t find in one shoemaking store. So I want to break this myth and want to show you what tools do you need to use as a beginner in shoemaking.
I will list all these shoemaking supplies here and in the tutorial below you will learn how to use all these shoemaking supplies in the making of shoes. Don’t worry, it only looks like there are too many shoemaking supplies but all needed tools for pattern making you can buy in any stationery store.
Shoemaking Tools For Pattern Making.
- Shoe last
- Masking tape
- Ruler with a straight angle
- Shoemaker tape
- Cardboards
- Utility knife
- Cutting board (any plastic board, even cutting board for vegetables)
- Silver erasable pen
- Compasses
- Paper A4
Only 6 Shoemaking Materials To Make Your Shoes From
- Leather for upper and lining
- Vegetable-tanned leather for soles and heels
- Insole cardboards: taxon and shank board
- Steel shanks
- Chemical nonwoven fabric (elastic material for shoe counters)
- Reinforcement tapes: 4mm and 15mm width
- 2 Types of the Shoemaking nails
- Contact glue
5 Shoemaking Hand Tools
- Awl
- Shoemaker knife
- Shoemaker hammer
- Shoemaker pincers
- Shoemaker rasp
CONCLUSION
How To Make Shoe Soles? These were the main sole-making techniques where we make soles from vegetable-tanned leather. The primary idea of this post is to show you the variety of sole-making techniques that you can use in making any footwear type. You can choose the best one that suits the entire shoe design idea you have.
In general, to design any footwear type and to make a pattern of this design you need to know the rules of construction of all existing footwear types but if you want to learn a shortcut system I developed, you are welcome to check out my “Footwear design course”.
To make all these types of shoe soles you will need to use different shoemaking tools and materials and if you want to learn more about it, check this post “Beginners Shoemaking Tools and Materials: The Definitive Guide 2019”. Also, if you are interested in learning shoemaking and want to learn deeper about the entire process of making shoes, you are welcome to read this post “How to Make Shoes: The Definitive Guide”.
Now, watch the tutorial I prepared for you with an explanation about all these techniques of sole making.
Why Trust Us?
We fully know how tough it is to search for trustworthy shoe advice, & that’s one of the chief reasons we built FootwearCorner. We live for outdoor & indoor adventure, also we take these reviews and guides very sincerely. Here are some of the logic you can trust us:
- Our choices are fully independent & based on personal and market experience.
- We have logged over 10,000 trail miles & test outdoor equipment for a living.
- We own & field test every shoe product we suggest, which is dismally not the norm.
- We visit Industry-Trade shows to hear about future product innovations.
- We regularly update our reviews & guides when the latest products launch.
- We treat our certificates as if they were for our friends & family.
- We are Life-Long learners & we are always open to helpful criticism. If you consider we missed a product or got something incorrect, we would love to hear your feedback.